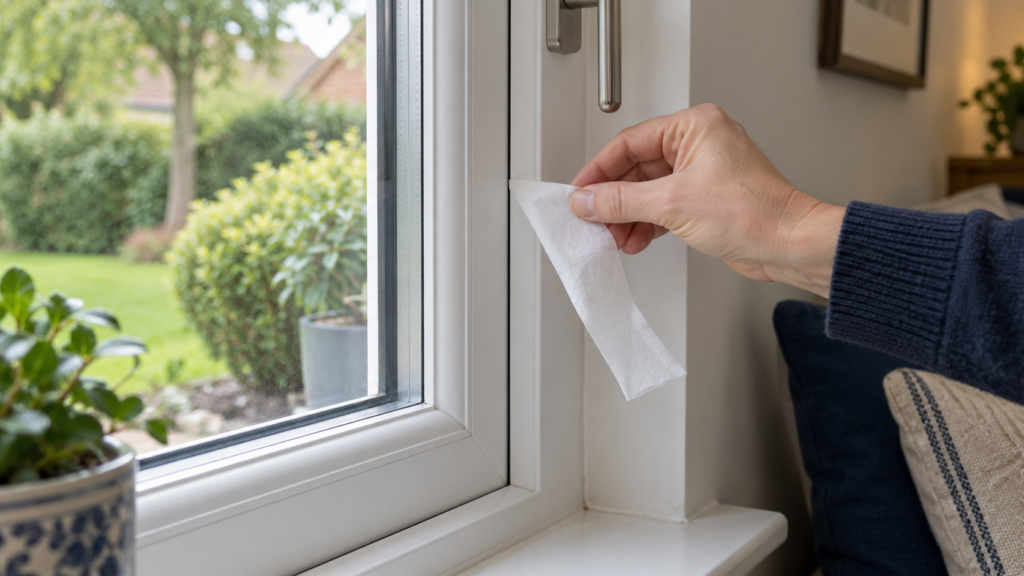
To find where a window draft is coming from, check the closed window in sections: the opening sash, the frame, and the joint between the frame and surrounding wall. A repeatable stream of air at one joint is a more useful clue than simply noticing that the glass feels cold.
Start with observation before buying weatherstripping or applying sealant. The place where you feel moving air may be an exit point for a concealed gap, and more than one condition can make the same window uncomfortable.
First, separate a draft from cold glass
A true air leak allows air to pass through an opening. It may become more noticeable when wind blows against that side of the house. Cold glass can create a similar sensation without an open gap: room air cools beside the glass and sinks, producing a downward current. Your body can also lose heat toward a cold window, making the area feel chilly.
These effects can occur together. A cold surface alone does not prove air leakage, while a moving curtain does not identify which joint is responsible. Look for a consistent pattern concentrated at a particular seam before choosing a repair.
Prepare a simple observation check
Choose a time when the discomfort normally occurs. Record the weather, which windows are affected, and whether nearby heating or cooling vents are operating. Keep normal household conditions; there is no need to create unusual pressure differences to begin investigating.
Gather a flashlight, a narrow strip of lightweight tissue, and a phone or notebook. Work from a stable indoor position. Keep the tissue away from heaters and moving equipment. Use these observations as screening clues rather than measurements of leakage or energy loss.
Avoid candles, lighters, and smoke for this check. You can map suspicious areas without an ignition source. Do not run multiple exhaust fans specifically to depressurize the house; pressure testing and combustion-appliance checks belong with a qualified professional.
Make sure the window closes normally
Open and close the window only if it operates safely. Look for debris in the accessible track, folded seals, and objects preventing the sash from seating. Close and lock it normally, then check whether the sash sits evenly against the frame.
A latch that will not engage, an uneven gap, or a corner that remains proud of the frame deserves attention. Do not force the lock to pull a distorted sash into position. Record what you see and check the manufacturer’s instructions before adjusting hardware.
Check the opening joints systematically
Hold the tissue close to each joint without pressing it into the gap. Pause long enough for movement from your hand to settle. Start along the bottom, continue up both sides, and finish across the top. On a double-hung window, include the meeting rail where the two sashes overlap.
Repeat any suspicious result. Move the tissue slightly away from the seam and compare its behavior with a nearby area. Air from a supply vent, your breathing, and a downward current beside cold glass can all move it. A localized response that repeats at the same joint is worth documenting, but it does not quantify the leak.
If the result changes with wind direction or speed, note that too. A quiet test on a calm day cannot rule out a leak that appears under different conditions.
Inspect weatherstripping and contact surfaces
With the window safely open, visually inspect accessible seals. Look for missing sections, tears, flattened material, loose corners, and dirt that prevents contact. Compare the suspect area with another section of the same window rather than assuming every seal should have the same shape.
Weatherstripping must fit the window’s design. A thicker replacement is not automatically better: an unsuitable profile can interfere with closure or put extra load on the hardware. Photograph the existing profile and identify the product before ordering parts.
Check around the frame and interior trim
If the opening joints appear sound, check the perimeter where the window meets the surrounding finish. Repeat the tissue observation near trim corners, the sill, and visible joints between the trim and wall. Use the flashlight to document cracks or separation.
Air emerging beside trim can point toward a concealed installation gap. The visible crack may not be the whole path. ENERGY STAR identifies drafts and visible gaps around closed windows as reasons to investigate sealing, and treats work behind trim as a more involved project.
Do not remove trim merely to complete this screening check. Concealed wiring, fragile finishes, and potentially hazardous older paint can change the work required. A professional can assess the underlying joint and select an appropriate repair.
Check nearby sources before blaming the window
Compare the sensation at the glass with the wall below it, nearby baseboards, and the path of air from a heating or cooling outlet. A room can feel drafty because of several leakage paths or uneven temperatures, even when the window is not the main problem.
Keep these observations separate from moisture symptoms. If the window is also wet, use our guide to interior, exterior, and between-pane condensation to identify where that moisture is located. Condensation and an air leak are not interchangeable diagnoses.
Match the next step to the finding
- Movement at an opening joint: Investigate seal condition, sash alignment, and normal latch engagement.
- Movement beside interior trim: Ask whether the installation joint needs inspection and air sealing.
- Cold glass with no localized movement: Consider surface temperature and room air circulation as possible contributors.
- Unclear or widespread discomfort: A home energy assessment may help identify the main sources.
Caulk belongs in suitable stationary joints. Moving joints generally need a compatible sealing system that still allows operation. Avoid filling unidentified slots or openings: some are part of the window’s drainage or ventilation design. Do not permanently seal an operable window shut as a shortcut.
When professional testing helps
If simple observations do not locate the problem, ask an energy assessor or window professional how they would distinguish leakage from cold-surface effects. Controlled pressure testing and other diagnostic tools can help investigate problems that are difficult to reproduce during normal weather.
Request an explanation of the location and evidence before accepting a replacement recommendation. A damaged seal or installation joint may call for a targeted repair. Whole-window replacement should follow an assessment of the window’s overall condition and available repair options.
When to stop the inspection
Stop if the glass is cracked or loose, the sash will not remain safely in position, or access requires leaning outside or working at an unsafe height. Visible rot, significant water damage, and major frame distortion also warrant professional evaluation.
Before requesting service, photograph the whole window, the suspect joint, and any identifying label. Provide your notes about weather, latch position, and where the tissue moved. This gives the service provider a useful starting point without dismantling the assembly.