Air drafts and visible daylight around an exterior door stem from four main issues: worn or flattened perimeter weatherstripping, an improperly set threshold or damaged bottom sweep, hinge sag causing leaf misalignment, or an unsealed rough opening behind the interior trim casing. Rather than replacing seals right away, perform a structured visual and tactile check to find the exact gap location. Applying new gaskets to a sagging or misaligned door leaf will bind components and cause early seal failure without stopping cold air infiltration.
Uncontrolled drafts and light leaking around exterior entry doors are common sources of thermal discomfort, energy loss, and potential moisture ingress. Homeowners often respond by purchasing adhesive foam tape or thick seals without first determining why the gap exists. However, installing extra sealing material onto a door frame that is sagged, skewed, or misaligned often prevents the latch bolt from catching cleanly and accelerates seal wear.
A location-first diagnostic approach separates perimeter gasket degradation from structural misalignment, bottom sweep failure, and concealed air paths behind decorative molding. By systematically isolating where daylight and air enter the assembly, you can execute the correct repair sequence or determine when a professional carpenter is needed.
For the same location-first airflow diagnostic around windows, see How to Find Where a Window Draft Is Coming From.
Direct Answer and Scope
Air and light leakage around hinged exterior entry doors can be categorized into four primary physical conditions. First, flattened, torn, or aged perimeter gaskets allow air bypass along side and head jambs. Second, damaged sweep fins or incorrect threshold height create bottom gaps at floor level. Third, loose hinge fasteners allow the door leaf to drop, generating a wide diagonal wedge gap at the upper latch corner while causing the lower leaf edge to drag. Fourth, unsealed gaps between the door frame jamb and rough wall framing permit cold air to bypass the door assembly entirely, emerging behind interior wood trim casing.
This diagnostic procedure applies to hinged exterior entry doors made of insulated steel, fiberglass, or solid wood that adjoin unconditioned spaces or outdoor environments. It focuses on non-destructive inspection methods to isolate frame alignment, latch compression, surface seals, threshold contact, and wall cavity integrity.
What the Reader Should Observe Before Acting
Before selecting replacement parts or making mechanical adjustments, execute a series of initial observations to document door operation. Begin with a visual light check during daytime or with an exterior light on while turning off interior room lights. Note whether daylight appears as a continuous line along a jamb, a isolated pinpoint spot, or an uneven diagonal wedge at the upper corner.
Next, perform a tactile draft check on a cold or windy day by slowly sweeping your hand along the entire frame perimeter—including the head jamb, hinge side, latch side, sill, and the outer border of the interior wall trim. Check the door leaf reveal, which is the space between the edge of the closed door leaf and the frame jamb on all three sides. An uneven reveal across the top or down the sides points directly to mechanical sag or frame rack.
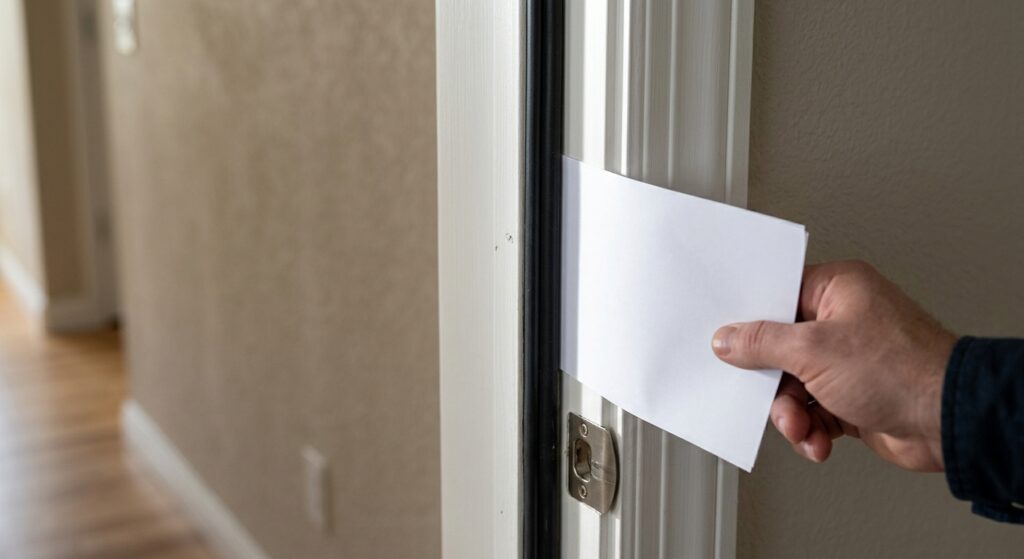
Check hinge integrity by opening the door partially, grasping the outer edge near the lockset, and lifting gently upward. Movement or looseness indicates worn hinge pins or stripped mounting screws. Finally, perform a paper compression check by placing a single sheet of paper between the door leaf and frame weatherstripping before closing and latching the door. If the paper pulls out with no resistance, compression is insufficient; if it pulls with light, uniform friction, the seal contact is correct; if it tears or jams tight, the door leaf is binding.
Diagnostic Sequence and Observation Matrix
To systematically identify root causes, follow a four-step sequence. Always check frame and hinge mechanical integrity first. If the door leaf sags or exhibits an uneven reveal, correct the mounting hardware before touching seals. Second, verify perimeter gasket compression using the paper test. Third, evaluate floor-level contact across the sill and bottom sweep. Fourth, inspect the rough opening frame-to-wall interface behind the decorative interior casing trim.
Analyzing specific physical observations helps narrow down the appropriate corrective action before buying supplies or adjusting components.
- Diagonal daylight at top latch corner & bottom leaf drags: Caused by hinge sag. Tighten loose hinge fasteners and replace stripped or unsuitable fasteners with hardware appropriate for the jamb and framing condition before adjusting seals.
- Continuous daylight line on latch side only & door rattles: Caused by inadequate latch compression. If the door is aligned but latch-side compression is weak, use the lockset or strike manufacturer’s approved adjustment method; strike designs vary.
- Air or light entering across floor level: Caused by threshold saddle misadjustment or worn sweep fins. Adjust threshold height screws or replace damaged sweep.
- Spotty light gaps with an even frame reveal: Caused by gasket degradation. Replace aged kerf or surface-mounted perimeter seals.
- Draft emerging from outer edge of interior wood casing: Caused by an unsealed rough opening behind trim. Remove interior casing and seal wall-to-frame gap.
Sources: Source S1 Source S2 Source S3
Common False Diagnoses and Wrong Turns
A common repair error is adding thicker weatherstripping over a sagging door top corner. Doing so increases closing resistance, distorts frame stops, prevents proper latching, and causes premature gasket failure. If the door is sagging, the reveal is uneven, or hinge hardware is loose, correct the mechanical issue before selecting or replacing weatherstripping.
Another error is stuffing loose fiberglass batt insulation into the gap between the door frame jamb and rough wall studs. Fibrous insulation functions as an air filter rather than a solid air barrier, allowing draft movement directly through the material. Use an appropriate continuous air-sealing method for the gap, such as compatible sealant with backer rod or low-expansion foam rated for window and door openings, following the product and door manufacturer’s instructions.
Homeowners also frequently mistake radiant cold surfaces or convective room air currents near glass panels for perimeter air leakage. Verify actual airflow using non-combustion tests before replacing functional seals. Lastly, avoid cutting or filing away weatherstrip sections near the latch bolt when a door is tight to close; doing so creates a permanent air bypass pathway.
Sources: Source S1 Source S3 Source S4
Safe Next Steps by Observed Condition
When hinge sag or loose fasteners are present, support the bottom edge of the open door leaf with a wedge. Check top hinge screws and secure loose fasteners through the jamb into structural framing, then verify that the reveal around the frame head is even.
For worn perimeter weatherstripping on an aligned door, identify whether the frame utilizes a kerf slot channel, surface flange, or adhesive backing. Remove old damaged gasket material, clean the slot or mounting surface according to manufacturer instructions, and press replacement material evenly into place without stretching the seal before re-testing with a paper compression check.
For threshold or bottom sweep gaps, first identify whether the threshold is adjustable. Follow the threshold or door manufacturer’s instructions and make small, even adjustments because screw direction and adjustment mechanisms vary by design; adjust only enough to achieve consistent sweep contact without making the door difficult to latch. If bottom sweep fins are torn or missing, remove the damaged assembly, cut a matching sweep to length, and secure it evenly across the lower door leaf. If drafts originate from behind interior wall trim, carefully score the paint line along the molding, pry casing off gently, and apply low-expansion polyurethane foam specified for door applications into the rough opening gap before reinstalling trim.
Sources: Source S1 Source S2 Source S3
What to Document for a Professional or Manufacturer
If diagnostic steps reveal structural frame distortion, extensive door leaf warping, or hardware failure requiring professional replacement, gather detailed documentation. Record specific gap measurements around the frame head, hinge jamb, latch jamb, and sill to illustrate perimeter irregularity.
Capture clear photographs in low interior light conditions showing daylight infiltration, alongside detailed photos of top hinge screw attachments and frame alignment. Document structural profiles by noting door leaf composition (steel, fiberglass, or wood), threshold type, weatherstrip attachment style, and any potential labeling or etching on hardware or pane corners to support manufacturer confirmation.
Safety Note
Safety Note: Do not force a binding door leaf, and never remove glazing or heavy frame components without proper assistance. Do not work at unsafe heights or on unstable surfaces during inspection. Contact a qualified professional immediately if glass is broken, frame hardware is dangerously loose, structural rot is present, or a door panel is at risk of falling.
Achieving an Airtight Exterior Door Assembly
Resolving air drafts and visible light gaps around exterior entry doors requires isolating the underlying mechanical or structural cause before attempting seals or hardware modifications. Systematic visual checks, reveal inspections, and simple compression tests quickly distinguish simple gasket degradation from hinge sag, threshold misadjustment, or rough opening air bypass.
By executing repairs in logical order—aligning hardware first, adjusting thresholds second, and renewing perimeter gaskets third—you ensure proper door operation, protect fresh weatherstripping from premature wear, and establish an effective thermal barrier.
- Perform visual light test with interior lights off and outdoor light on.
- Perform tactile draft test along all frame jambs, sill, and interior trim casing.
- Check for uniform perimeter reveal between door leaf and frame jambs.
- Lift open door near lockset to evaluate hinge play and screw tightness.
- Conduct paper compression check along top, latch side, and hinge side jambs.
- Inspect threshold saddle screws and bottom sweep fins for wear or misadjustment.
- Verify that cold air is an actual air bypass and not radiant cooling off glass.