To narrow down an installed window’s brand, model series, and approximate age, collect several independent clues: product labels, glass-corner etchings, spacer-bar printing, frame and sash construction, and hardware markings. No single visual clue proves the complete window identity. A hardware name may identify only a component supplier, and a glass date may describe a replacement glass unit rather than the original frame. Use the evidence to ask a manufacturer, distributor, or parts specialist for confirmation.
Homeowners often need this information when ordering a sash, lock, balance, operator, weather seal, or insulated glass unit. The challenge is that a window can combine a frame from one company, glass from another fabricator, and hardware from a third supplier. Treating one logo or stamped number as the window brand can therefore lead to an incorrect part order.
A careful inspection should document what is visible without dismantling the unit. Label locations vary by manufacturer, product series, operating style, and production year. Check only areas that are safely accessible during normal operation, photograph every clue in context, and preserve uncertainty until a knowledgeable supplier confirms the match.
Related Pane & Hinge guide: Read the related guide.
Start With Labels, Glass Marks, and Frame Construction
Begin with wide photographs of the complete window from indoors and, when safely accessible, outdoors. Record whether the frame appears to be vinyl, wood, clad wood, aluminum, or fiberglass. Photograph the sash arrangement, meeting rails, locks, handles, screens, and the shape of the frame profile. These features help a parts specialist narrow the product family, but they should not be treated as a conclusive brand identification.
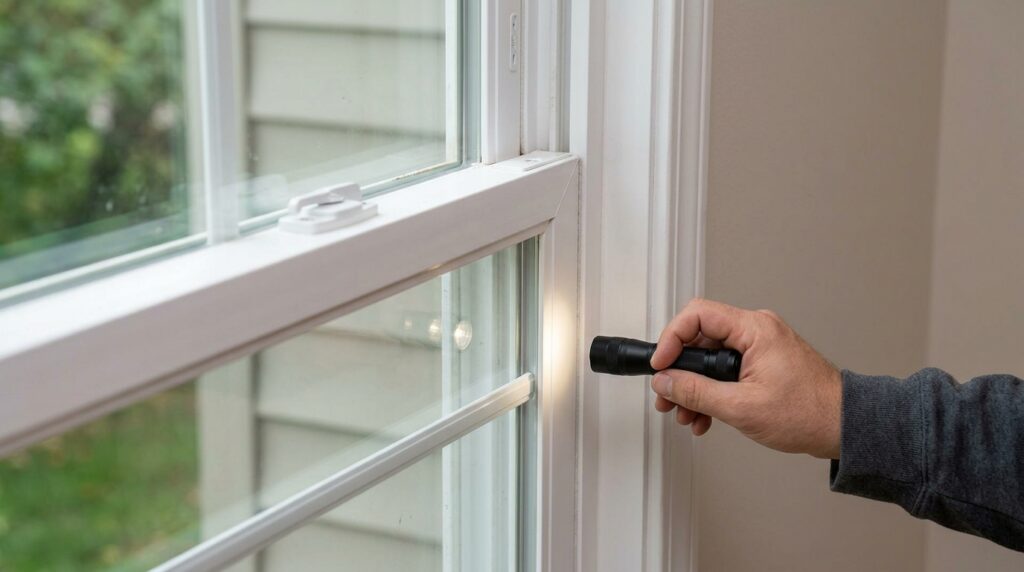
Next, use angled light to inspect the corners of the glass for faint etching and look through the edge of an insulated unit for printing on the spacer bar. Glass markings may identify the glass fabricator, safety treatment, coating, or production period. They do not necessarily identify the company that made the surrounding window. A replacement glass unit may also be newer than the frame, so describe its date as a glass-manufacturing clue rather than the installation date.
Product labels may be visible on an accessible jamb, sash edge, header area, track, or another concealed surface exposed during ordinary operation. These are possible locations, not universal rules. Do not remove stops, glazing beads, or fixed panels to search for a label.
Sources: Source S1 Source S2 Source S5
Hung and Tilt Window Clues
For a single-hung or double-hung window, inspect the surfaces revealed when the sash is opened normally. Depending on the manufacturer and series, a product label may appear on a jamb, a sash edge, near the meeting rail, or in another accessible channel. If the sash is designed to tilt inward, examine only the areas exposed by the normal tilt procedure described by the manufacturer. Do not force a sash that binds or assume every hung window uses the same release method.
Record the arrangement of locks, tilt latches, pivot bars, balance shoes, cords, or spring balances without removing them. A stamp on a balance or latch can help identify that replacement component, but it may not identify the window manufacturer. Photograph the full sash and frame before taking close-ups so a parts desk can understand where each mark was found.
Casement and Awning Window Clues
Casement and awning windows use operators, hinges, locks, and linkage arms that differ from hung-window balance systems. Open the sash only through its normal operating range and photograph the operator cover, handle, locking points, hinge side, and any markings visible on the arms. Do not transfer balance or tilt-latch identification steps from a hung window to these systems.
An operator or hinge stamp usually identifies the hardware maker or part family, not necessarily the company that built the entire window. Pair that stamp with photographs of the sash profile, frame corners, lock layout, glass etching, and any accessible product label. Manufacturer-specific support pages or a parts desk can then compare the combined evidence with known product lines.
Sources: Source S1 Source S2 Source S4
Fixed and Picture Window Clues
A fixed or picture window has no operating sash hardware, so crank, hinge, balance, and tilt-latch clues do not apply. Focus on safely visible frame construction, glass-corner etching, spacer-bar printing, permanent labels, and the relationship between the glass unit and surrounding frame. Photograph the complete opening as well as close details of each mark.
Because fixed glazing may have been replaced, a glass code or date cannot by itself establish the age of the frame. Differences in spacer color, sealant appearance, or glass markings between adjacent units may indicate that one glass unit was replaced, but confirmation should come from installation records, a manufacturer, or a qualified window professional.
Interpret Product, Glass, Certification, and Hardware Marks Carefully
A factory product label or serial identifier is generally more useful than a component stamp, but its meaning still must be confirmed against documentation for the suspected manufacturer. Record the entire string exactly as shown and photograph the surrounding surface. Do not invent missing characters or assume that a date-like string represents the installation date.
Glass etchings and spacer printing relate primarily to the glass fabrication. Hardware marks relate primarily to operators, locks, hinges, balances, or latches. Certification or performance labels may provide additional product clues, but temporary labels can disappear and permanent markings vary. Use the supplied label reference to understand the distinction, then let a manufacturer or qualified specialist interpret the collected evidence.
Sources: Source S1 Source S2 Source S3 Source S4 Source S5
Build an Evidence Packet for Confirmation
Create a short evidence packet rather than sending one isolated close-up. Include photographs of the complete window, the interior and exterior frame profile when safely accessible, each label or etching, the spacer bar, and the relevant hardware. Add notes describing the operating style, frame material, sash arrangement, approximate installation period if documented, and the exact location of every photographed mark.
When requesting a replacement component, include the dimensions requested by the supplier and state how they were taken. Avoid assuming that visually similar windows use interchangeable parts. A parts specialist may need mounting patterns, profile shapes, or additional photographs before confirming compatibility. If the original manufacturer is unknown or no longer operates, the evidence packet can still help a distributor evaluate a universal replacement component.
Sources: Source S1 Source S2 Source S4 Source S5
Safety Note
Do not force a stuck sash, remove glazing beads, detach glass, or lift a heavy window component solely to search for identification marks. Use only normal operating positions and inspect from a stable indoor location. Do not lean through an upper-story opening or work from an unsafe height.
Stop and contact a qualified window professional if the glass is cracked, hardware is loose, a sash feels unstable, or there is any risk that a panel could fall. A photograph taken from a safe position is more valuable than exposing yourself to a fall or glass injury.
Confirm the Window Before Ordering Parts
The goal of inspection is to narrow the possibilities and assemble evidence, not to declare a manufacturer or model from appearance alone. Separate clues by what they identify: frame labels may relate to the complete unit, glass marks relate to the glass fabrication, and hardware stamps usually relate to individual components.
Send the combined evidence to the suspected manufacturer, an experienced distributor, or a window professional. Ask for confirmation of the series and part compatibility before ordering. Preserve photographs and notes so later repairs can use the same verified record.
- Photograph the complete window and record its operating style
- Check safely accessible frame and sash surfaces for product labels
- Inspect glass corners and spacer bars using angled light
- Keep hung or tilt hardware clues separate from casement or awning hardware
- Record component stamps without treating them as proof of the window brand
- Describe every label location as a possible manufacturer-specific location
- Prepare contextual photographs and supplier-requested dimensions
- Confirm the likely manufacturer, series, and part before ordering