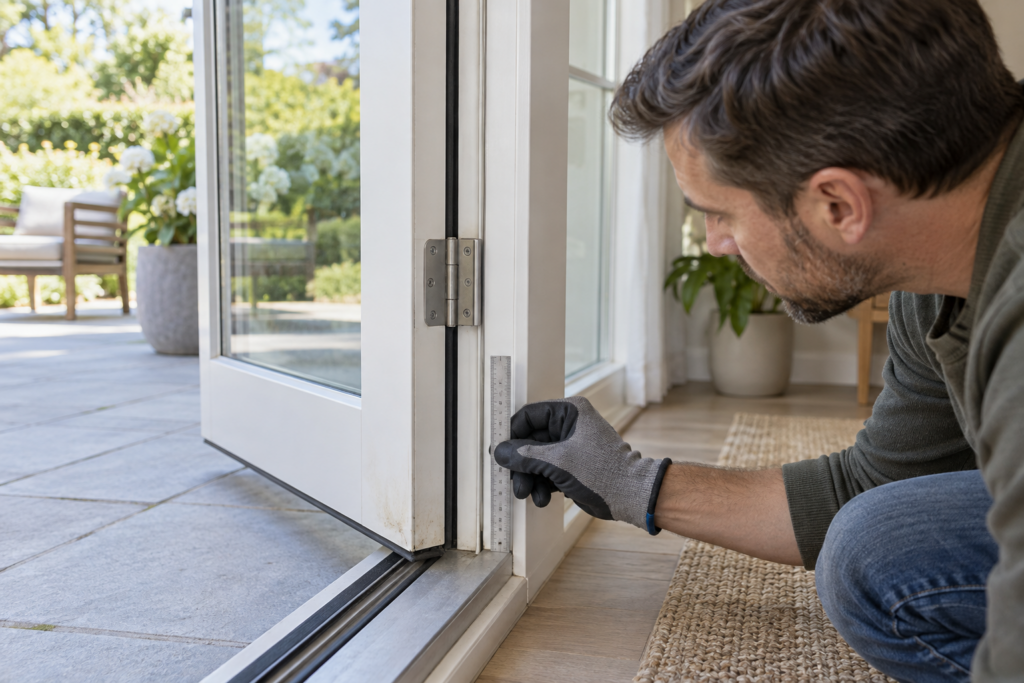
A hinged patio door that rubs the frame or sill is showing where the panel and opening no longer have enough clearance. The rub location is evidence, not a complete diagnosis. First map the contact point and compare the gaps around the panel; then distinguish loose fasteners, hinge wear or adjustment, debris, swollen finishes, and movement of the frame before changing anything.
This guide is for hinged patio doors, not sliding panels. Adjustment mechanisms vary by brand, product line, handing, hinge generation, and installation. Use the observations below to decide what to inspect and what information to find before following instructions for the exact door.
Observe the door before acting
Open and close the door slowly from indoors while keeping fingers clear of the hinge and latch edges. Do not force the handle or lock. Note when resistance starts, whether the panel lifts or shifts as it moves, and whether the symptom changes with weather.
Photograph the complete door, each hinge, the lock edge, the sill, product labels, and every rub mark. Look for loose or missing fasteners, a visibly damaged hinge, debris on the sill, torn weatherstrip, cracked glass, water damage, or an opening that appears out of square. These observations should come before any adjustment.
Map the rub location and the reveal
The reveal is the visible clearance between the door panel and the surrounding frame. With the door nearly closed but not latched, compare this gap at the top, both sides, and bottom. Use a ruler or a stack of identical cards only as a comparison tool; do not insert anything that could damage the weatherstrip.
| Observed contact pattern | What it may suggest | Next low-risk check |
|---|---|---|
| Latch-side bottom corner rubs the sill | The panel may have dropped, a hinge may be loose or worn, or the opening may have moved | Compare the top reveal from hinge side to latch side and inspect every hinge attachment |
| Latch-side top corner rubs the head jamb | The panel may sit too high or lean toward the latch side | Compare both side reveals and check whether the lock edge remains parallel to the jamb |
| Hinge edge rubs at one point | A hinge leaf, fastener, weatherstrip, or local frame area may be interfering | Inspect the exact contact point rather than shifting the entire panel first |
| Most of the bottom edge drags | Debris, a raised sill component, finish buildup, panel position, or broader frame movement may be involved | Clean loose debris and compare bottom clearance across the full width |
| Door moves freely until the latch engages | The receiver, lock alignment, or weatherstrip compression may be the main issue | Check alignment without forcing the handle; do not treat it automatically as a hinge problem |
| Gap changes abruptly near one hinge | Loose attachment, hinge wear, or a damaged component becomes more likely | Stop if hardware is cracked, distorted, pulling away, or cannot support the panel securely |
Use an incremental diagnostic sequence
- Confirm the symptom. Move the panel slowly and mark the first contact location with removable painter’s tape on an adjacent safe surface, not on a fragile finish.
- Remove simple interference. Clear loose dirt from the sill and contact surfaces. Do not cover drainage openings or lubricate unknown surfaces.
- Compare reveals. Record whether each gap is even, tapered, or locally pinched. Compare photographs from the same angle.
- Inspect hinge attachment. Look for movement between hinge leaf and frame or panel while another adult operates the door gently. Keep hands out of pinch points.
- Separate operation from locking. If the panel swings freely but binds only while latching, investigate the receiver and weatherstrip contact under product-specific guidance.
- Identify the product. Find the manufacturer, series, approximate production date, handing, inswing or outswing configuration, and hinge style before obtaining adjustment instructions.
- Change one controlled variable only. If the manufacturer documents an adjustment for that exact hinge, record the starting position and use small specified increments, checking operation after each change.
This order preserves diagnostic information. Multiple random hinge changes can hide the original pattern, shift load unevenly between hinges, and make it difficult to return to the starting position.
Do not assume every rub needs hinge adjustment
A clean rub mark proves contact occurred; it does not prove why. Seasonal swelling can affect wood components or finishes. A loose threshold part can reduce clearance. Thick paint, displaced weatherstrip, an added floor covering, hinge wear, or movement in the frame can imitate poor hinge adjustment.
If intact weatherstrip folds or bunches at the contact point, first determine whether panel alignment is causing the seal to catch. Checking weatherstrip condition and fit helps distinguish damaged material from poor contact.
Also distinguish a hinged door from a gliding patio door. Andersen’s current patio-door guidance, for example, describes hinge adjustments for certain inswing and outswing doors but roller adjustments for gliding doors. That distinction is manufacturer-specific evidence for identifying the mechanism, not permission to apply Andersen steps to another product.
Product-specific adjustment has limits
Andersen documents horizontal and vertical adjustment for specified A-Series and 400 Series Frenchwood inswing hinged patio doors manufactured after November 2005. Its instructions call for a 5/32-inch hex wrench, coordinated horizontal changes across the hinges, and a defined bottom-to-top sequence for vertical adjustment. Andersen also notes that the hinge design changed in 2005 and provides different material for earlier doors.
Those details are useful only after the door is positively identified. Another brand, an older Andersen door, an outswing unit, a non-adjustable butt hinge, or a multi-panel system may use different clearances, load distribution, tools, and procedures. Do not use a visible hex socket alone as proof that the same sequence applies.
Common wrong turns
- Turning every hinge before recording the original reveals and contact point.
- Driving attachment screws tighter without knowing their condition, substrate, or specified torque.
- Using the lock to pull a misaligned panel forcibly into the frame.
- Planing or sanding the panel before ruling out debris, displaced seals, and hardware problems.
- Lubricating weatherstrip, tracks, or finishes with an incompatible product.
- Copying adjustment directions from a different brand, vintage, hinge, or door type.
- Filling sill openings that may be part of the drainage system.
Safe next steps by condition
- Loose debris or a displaced removable obstruction: clear it, retest slowly, and document whether the reveal remains uneven.
- Intact adjustable hardware on an identified product: obtain the current manufacturer procedure and make only the specified incremental adjustment.
- Loose, worn, cracked, or pulling hardware: support the door safely and arrange appropriate hardware or professional service instead of relying on adjustment alone.
- Binding only during locking: inspect receiver alignment and seal contact under the correct product instructions.
- Frame movement, water damage, or persistent broad contact: investigate the opening and installation rather than repeatedly shifting the hinges.
- Unknown product or adjustment range: stop with the observations recorded and request identification from the manufacturer or a qualified door technician.
When to stop
Stop operating or adjusting the door if the glass is cracked or loose, a hinge or frame connection is separating, the panel feels unstable, a fastener spins without holding, the sill or frame is soft from moisture, or safe access requires controlling a heavy panel alone. Keep children and pets away from the work area and keep hands clear of hinge and closing edges.
Adjustment cannot correct every installation or structural condition. A measured reveal documents geometry at that moment; it does not by itself identify settlement, concealed water damage, fastener embedment, or the remaining adjustment range.
What to document for help
Provide the manufacturer and product label, approximate age, inswing or outswing direction, active and passive panel arrangement, photographs of the whole unit and each hinge, close-ups of rub marks, and reveal measurements at matching locations. State whether rubbing occurs through the full swing, only near closing, or only when locking, and whether the symptom changes by season.
This evidence lets a manufacturer or technician distinguish a documented adjustment from worn hardware, installation movement, or a component replacement. For how Pane & Hinge evaluates product-specific evidence and uncertainty, see How We Research and Review.